Saturday, October 2, 2010

Fun with Vinyl!

I finally tried to cut vinyl with my Cricut. I was helping a friend with a project and sadly it didn't go as smoothly as I would have liked. We made it work, but it wasn't great. I read more blogs and started to play some more. I figured out the right settings and now it works like a charm!! My first project was new numbers for our new mailbox. It worked so well!! We'll see how the vinyl holds up thru more rain and then snow. But, it is easy enough to re-do so I'm not worried if it gets ruined! :)

I don't know if you can see the sail of Tannen's boat, but I made a red N with a white shadow. I made a smaller one also that he has on his bike helmet now.


We just re-did the kids bathroom and finally got this towel rack up. I used white vinyl to put their names above their hooks.


More projects to come...What to do next?!?! :)

More card samples

Here are 2 other card designs I came up with for the Super Saturday at our church. I realized some people may not want to do christmas cards, so I came up with a birthday card and a thank you card option. The point of the class is to teach the 'pop-up' technique, and the ladies can pick whichever they want to do! The birthday card is actually a different kind of pop-up that allows you to make a gift card holder in between the 2 pop-up sections. Kind of fun! :) With different papers, different choice of stamps, the possibilities are endless and I'm excited to see what everyone else comes up with during class!


Friday, September 10, 2010

"Flat" card

I haven't done a lot with flat cards. But I tried to do something on a regular card and didn't like it. So I cut at the fold and was left with this flat! So, I just wrote on the back and threw it in the envelope! I was happy with how it turned out and how simple it will be to duplicate when I just need something quick!

Pop-up Christmas Cards

I made these cards as samples to show for a card-making class I may teach in October at church. And I'm pretty sure I'll use one of these designs, or something similar for sending out christmas cards this year :)


(the inside says "Warm Holiday Wishes")

Bulletin Board

It was my turn to do the bulletin board in our Primary room at church. I like how it turned out, but Bryce said it looks too much like Valentine's day :)

Back To School

I made these little kits for the kids teachers. I made a stack of thank you cards for each of them, then added post-it flags, red pens, Chapstick and mints. The girls teachers also got stickers, but I figured 5th grade AND a male teacher wouldn't be so into stickers :) The bags are from Clear Bags, and I love them! They also have clear boxes, and different sizes of envelopes and everything else!


Big Hug

This card was made for a family that suffered a tragedy. We wanted to do something from our Primary to the family, just to let them know we were thinking of them and praying for them. Here is what I came up with:


Dino-Mite!

Here's another super-cute guy from the Create A Critter cartridge. The more cards I make, the more fun I have! And the more I realize how handy rubber stamp phrases are. I just hand-wrote the inside of this one, but I'm now working on adding to my stamp collection. Thank you, Michael's for 40-50% off coupons!! :)


Saturday, August 14, 2010

Music Time Game

As my mom and I were driving home from Chicago, I was thinking about things I could do with all the new things I learned. My favorite technique was the pop-up card. And in the My Pink Stamper class, we worked with the Create A Critter cartridge for my Cricut. I have it, but haven't used it too much because I hadn't taken the time to figure out how to layer it all. So. Very. Easy. Thanks Robyn for making it so easy!!! I used the Create A Critter and the Paper Dolls cartridges. For the text, I used Pooh Font (I think...either that or Sesame Street) My mom rocks and helped me make the holder for it (ok really she did it all, I just went to help pick out the fabric and vinyl, then I stood there and watched her sew it all together!! Thanks Mom!!!) I took it over to my fabulous Primary music leader this week and she loved it! So, here is what I came up with!


Wednesday, August 11, 2010

Get Whale Soon

I made this card for my friend's little boy. I thought I had a "Get Whale Soon" stamp, but it must be on one of the sets I WANT to get! So I had to just hand-write it, but that's ok! He loved the card and asked his parents to hold it open so he could look at the whale! :) Get 'whale' soon, buddy!!


I used double sided paper to make the card, cut at 5x12 and 4x11 and folded each in half. Then used the pop-up technique I learned in Chicago, and added the whale & starfish from the Create A Critter cartridge. Check out this tutorial on how to do the pop-up effect. Super easy. (Tho I space my cuts about an inch apart so I have a shorter pop-up. That's about the size you need to mount a 2-3 inch cut from Create A Critter) You make the pop-up with the smaller card, then you tack it down to the bigger card. Then you are ready to add your item that will pop-up when opened!! So easy and so cute!!

RID Region IV Conference

The RID is the national organization I belong to for Interpreters. Every 2 years they have a national conference, and then they have a regional conference in between. Nebraska was the proud host of our region's conference this year. Good friends of mine put in countless hours to put on an amazing conference! The theme was "Alive and Rock'n" so I offered up my scrappin' skills to make some guitar themed signs and thank you notes.


They also asked me to make a sign for outside the Silent Auction room. The 'venue' was suggested by a member of the Oklahoma RID chapter.


I was also asked if I could try to make this sign
for one of the halls. It is from Austin's 6th street. I was so excited about how close I got! I love my Cricut & my Gypsy!!!

Monday, August 2, 2010

Provo Craft Booth

The Provo Craft booth was a lot of fun. They had demos of their newly designed Cuttlebug that comes out this fall with new embossing folders. And demos of the Cricut Cake. And demos of the Yudu. And the most exciting was the brand new Imagine!! Design, print and cut all in one! It is pretty cool. But the price tag won't be. It's nice to dream! :)

Here are the decorations at the booth. No, I cannot cut this big on my Cricut. I heard someone ask that question... They sent it to be printed/cut somewhere. (But I can make smaller versions of 3D images. Of the ones pictured, I only have the cartridge that made the princess castle...thanks Mom!!)


They also gave out these glasses. We kept them on our head for both days because they'd give out raffle tickets if they saw you around with them. We didn't win any of the cool prizes, but that's alright. The girls were excited to get rock star glasses!!


Make & Takes

Many of the booth's had free Make & Takes. We didn't do even a fraction of what was available. But we sure had fun doing what we could work in!! (We did do a few other non-card crafts...Maybe I'll take a picture of those and post them too. But here's all my scrapbook-y stuff! :))

This was a make, but not take. They were collecting cards for Breast Cancer patients. We were happy to create with pink for a great cause!!


The 3M booth had Post-it paper projects. This stuff ROCKS!! We made this little purse there. All the colored paper and flowers are Post-it backed paper. It made the project so easy!! We also got a few other project kits to bring home and try. And they gave us 2 full-size product samples of Scotch adhesives! I loved that booth!! :)


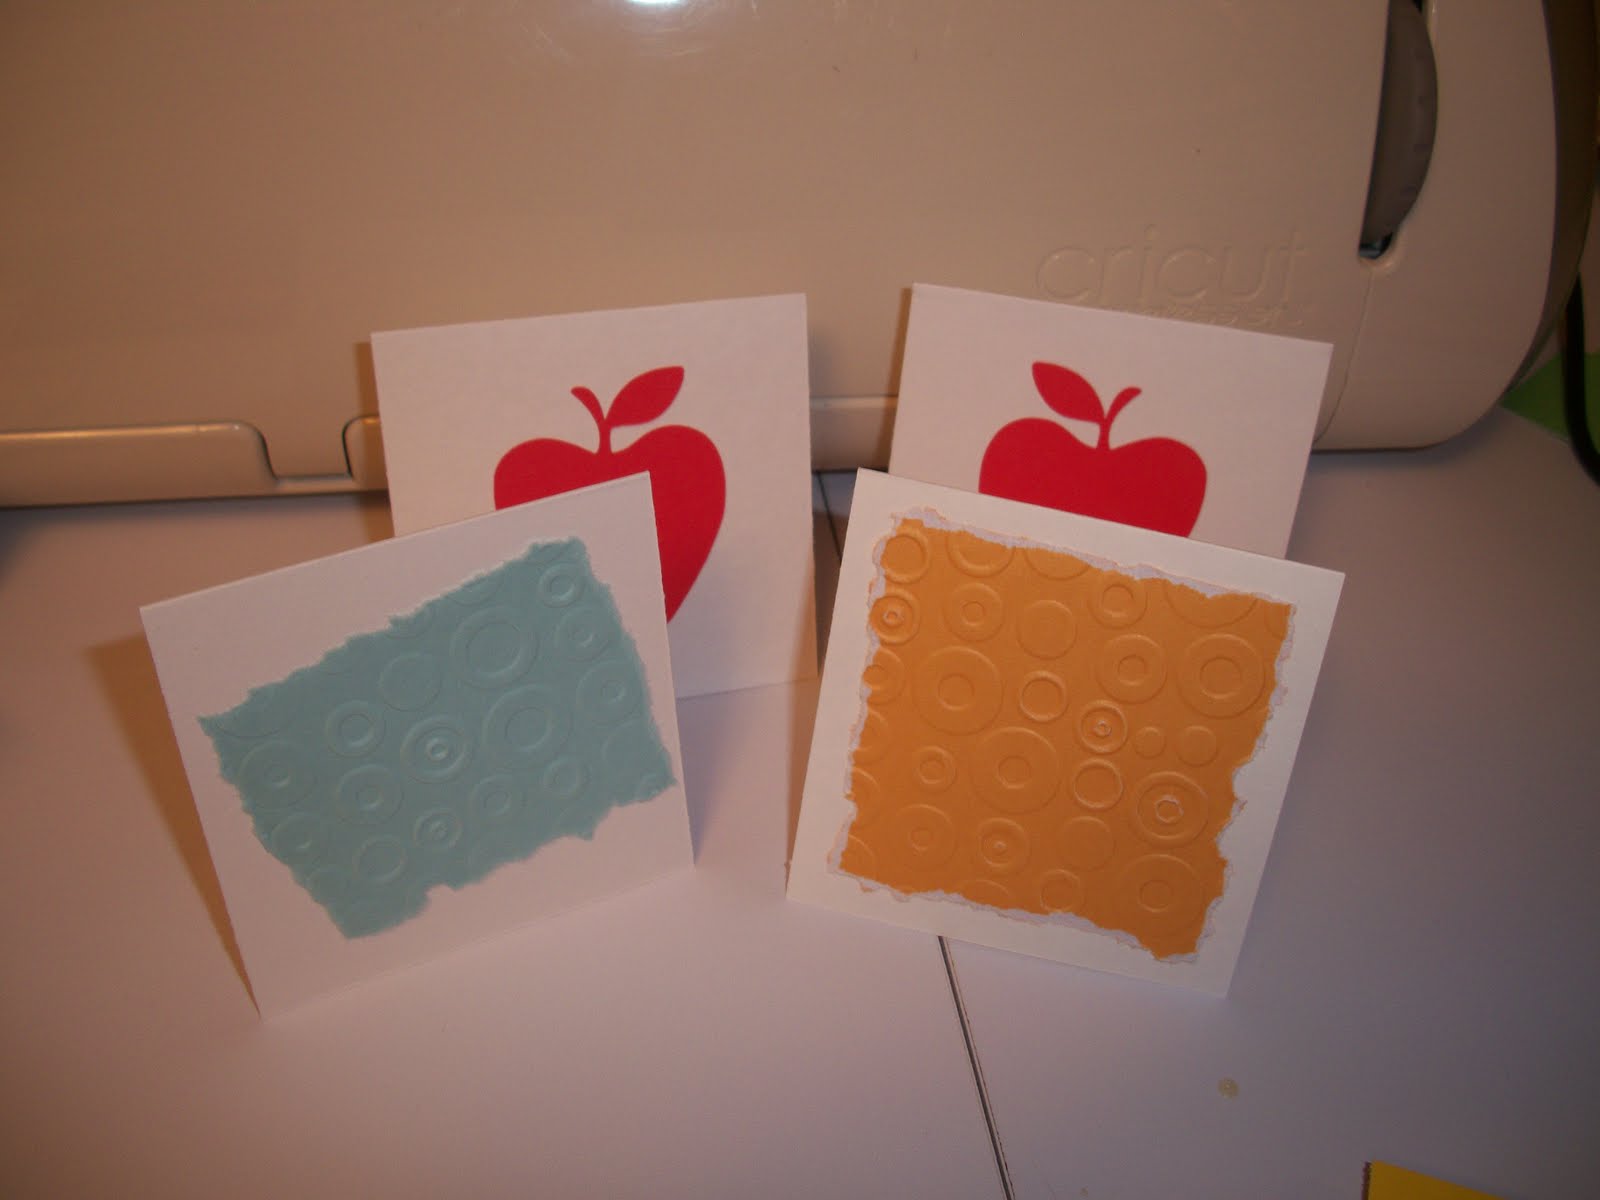
We made this card at the EK Success booth. We learned how to use the punch around the page. I have a different set of these and don't use them cuz I could not figure out how to get it to line up. So glad we stopped at this booth, cuz now I know how to line it up!!


Michael's was showing a new Fiskars tool. We weren't that impressed with the actual tool, but we liked the card idea! Also at the Michael's area was a mini-scrapbook demo. We got to the table right when they were running out, and got the last 2. We learned how easy it is to color the edges of a paper with an ink pad. We actually just took the kits and will do them at home. And, since that lady was out of kits, she also let us take the leftover adhesives and stamp pads! Wahoo!!


And now for my favorite one!! We stopped at Custom Crops a few times. The last time we stopped by it was to shop right before they closed. We were walking to the store part of their booth when I noticed a lady cleaning up the Make & Take area. But there were 2 sets still out, right next to each other. So we asked if we could sit down and do the card. We had fun talking to her and it ended up being my favorite card and my favorite new technique! It was SOOO simple to make the 'pop-up'. So my plan for the Create-A-Critter I talked about in the Pink Stamper post will also include the pop-up technique! I am so excited!!!